One of the most important things you can change when working with AI models is the temperature setting. Knowing the best Temperature to use when using Vertex AI for content creation, customer service, or data analysis can have a significant effect on the results you get. Recently, I explained how to fine-tune settings for Gemini; now, let’s explore what temperature to use for Vertex AI for even better results
In this article, I’ll explain what Temperature means in Vertex AI, how it affects how well the model works, and give you some tips on how to find the right Temperature to get the results you want.
What You’ll Learn in This Guide:
- The definition of Temperature in AI models and how it influences responses.
- Optimal temperature ranges for various use cases.
- How to adjust temperature settings in Vertex AI.
- Key considerations when tweaking temperature settings.
- Solutions to common challenges and how to fine-tune your models for better performance.
Brief Explanation of Vertex AI and Its Role
You probably know about Vertex AI if you use Google Cloud’s AI tools. This platform makes it easier for developers to create, deploy, and manage machine learning models on a large scale. One of the best things about Vertex AI is that you can change how it works, like adjusting the Temperature and other settings.
Importance of Temperature in AI Models
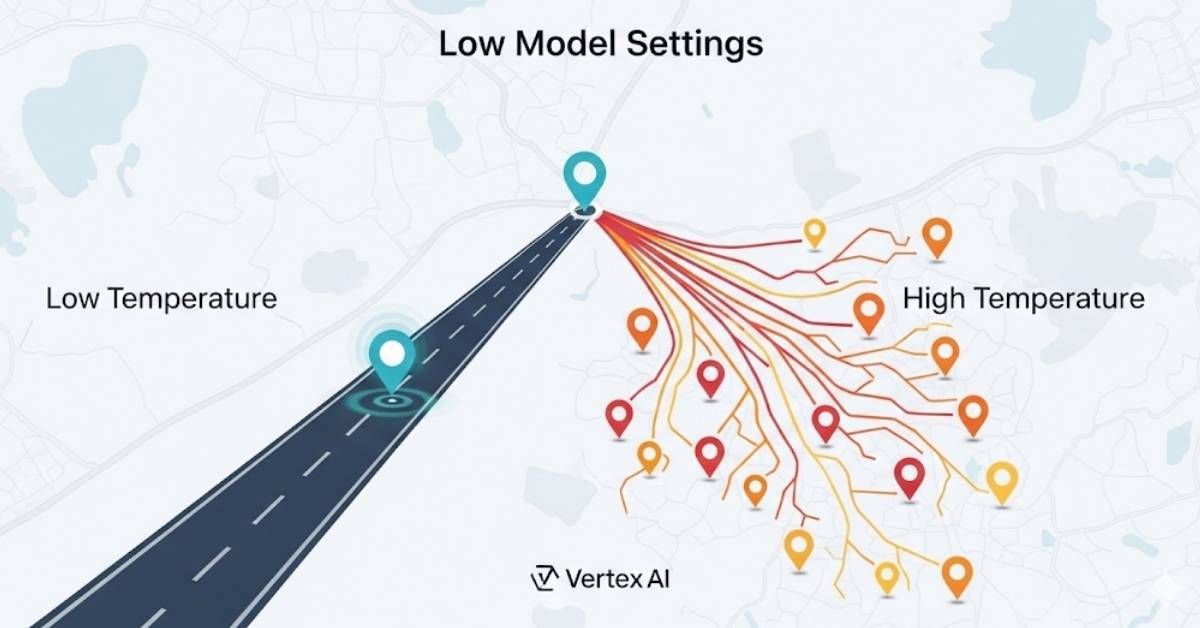
The Temperature is very important in how the AI makes its responses. It manages how random the model’s output is. When the Temperature is low, the AI’s answers are more certain and predictable. When the Temperature is high, the answers are more random, which makes the output more varied and creative. You can change the Temperature to make the AI’s responses better for different tasks, like coming up with new ideas or writing accurate content.
What is Temperature in AI Prompts?
Definition of Temperature
In simple terms, Temperature in AI controls how varied or random the responses will be. It determines whether the AI stays focused on the most likely responses or explores a wider variety of possibilities. Lower temperatures (e.g., 0.0-0.3) will generate more predictable outputs, while higher temperatures (e.g., 0.7-1.0) can lead to more diverse or creative outputs.
Why Temperature Matters
Temperature is essential because it directly influences the balance between accuracy and creativity. For example, if you’re working on a technical task like debugging code or providing legal advice, you need a model that delivers accurate, consistent, and reliable answers. This requires a low temperature setting. On the other hand, if you’re generating creative content like stories or brainstorming ideas, you prefer a higher temperature to foster more diverse responses.
Optimal Temperature Ranges for Different Use Cases
The optimal temperature range varies depending on what kind of task you’re using Vertex AI for. Here’s a quick breakdown of the temperature settings based on everyday use cases:
Low Temperature (0.0-0.3)
- Best for: Tasks requiring factual accuracy and consistency, such as customer support, technical queries, or legal documents.
- Effect: The model’s responses will be more consistent, repetitive, and predictable. This is ideal for tasks that require high precision and little to no creativity.
Medium Temperature (0.4-0.7)
- Best for: Tasks that need a balance between creativity and logical coherence, such as content writing, marketing copy, or idea generation.
- Effect: The responses will still be grounded in logic but will allow some creativity to surface. This range is ideal for producing responses that are both engaging and relevant to the task.
High Temperature (0.7-1.0+)
- Best for: Creative tasks like story generation, brainstorming, or exploring new ideas.
- Effect: The AI becomes more creative and diverse in its responses. You’ll get unexpected, sometimes surprising outputs, which can be great for tasks that encourage innovation and exploration.
How to Set Temperature in Vertex AI
Whether you prefer using the Vertex AI Studio interface or the Vertex AI Python SDK, adjusting the Temperature is a simple process. Below, I’ve provided instructions for both methods.
Through the Vertex AI Interface
- Open Vertex AI Studio in your Google Cloud console.
- Navigate to the specific model you want to adjust.
- Find the temperature setting in the model’s configuration options.
- Use the slider to adjust the Temperature to your preferred range.
- Once set, test the model’s response to see how the changes affect the output.
Using the Vertex AI Python SDK
For programmatically adjusting the Temperature, here’s an example Python code snippet you can use:
from google.cloud import aiplatform
def set_temperature(project_id, location, model_id, temperature):
endpoint = aiplatform.Endpoint(model=model_id)
response = endpoint.predict(instances=[{"input": "Your prompt here"}], parameters={"temperature": temperature})
print(response)
# Example: Setting Temperature to 0.5
set_temperature('your_project_id', 'us-central1', 'your_model_id', 0.5)
This Python code allows you to pass in a temperature value programmatically, making it easy to adjust settings as needed.
Factors to Consider When Adjusting Temperature
Adjusting the Temperature requires careful thought about your use case and goals. Here are some key factors to keep in mind:
Understand Your Goal
Before tweaking the Temperature, think about what you want from the AI. Do you need a creative response, or is your focus on factual accuracy? If it’s the former, go for a higher temperature. If it’s the latter, stick to a lower value.
Start with a Moderate Value
Starting with a moderate temperature (e.g., 0.5) is often the best approach. It gives you a balanced mix of creativity and predictability. From there, you can adjust based on the responses you receive.
Experiment and Iterate
Temperature settings aren’t one-size-fits-all. Don’t hesitate to experiment with different values. The beauty of AI is that it allows you to fine-tune and iterate quickly. See how the model responds, and keep adjusting until you get the desired outcome.
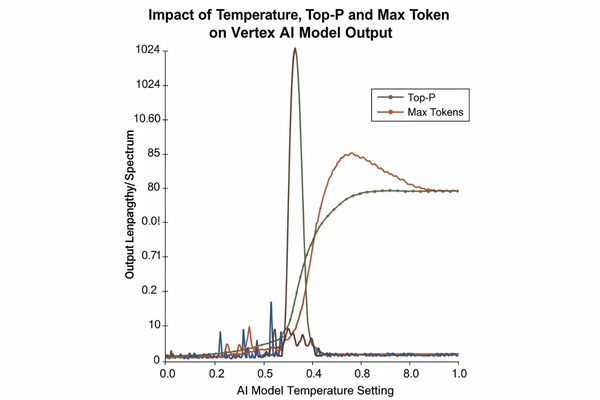
Other Parameters to Consider
Temperature is just one piece of the puzzle. Other parameters, such as max tokens (which determines the length of the output) and top-p (which influences diversity), also play a role. Adjusting these in combination with Temperature will help you fine-tune your model’s responses.
Common Challenges and Solutions
Even with careful temperature settings, you might run into some issues. Here are common challenges and how to solve them:
Dealing with Too Much Randomness
If the output feels too random or irrelevant, it may be due to a high temperature setting. To fix this, try reducing the Temperature to around 0.2 or 0.3. This will make the responses more focused and deterministic.
Reducing Overfitting
Sometimes the AI’s output becomes too rigid, offering repetitive or overly simplistic answers. This could be due to a low temperature setting. If this happens, increase the Temperature to 0.6 or 0.7 to introduce more variety into the responses.
Related Considerations and Additional Tips for Temperature Optimisation
Adjusting Temperature is not a one-size-fits-all process. Here are some additional insights that may help you optimise temperature settings further:
Adjusting Temperature Based on Use Case Complexity
For tasks that have clear, structured prompts (like data analysis), a low temperature (0.0-0.3) will be more effective. However, for open-ended tasks (such as creative writing or brainstorming), higher temperatures (0.7-1.0) will encourage more diverse responses.
Temperature and Response Length
Higher temperatures often result in longer, more detailed responses. If you need concise answers, use a lower temperature to limit unnecessary expansion. Keep an eye on max tokens as well, to ensure responses are not excessively long.
Temperature and Fine-Tuning
During the fine-tuning phase of your model, Temperature can help make your AI more suited to your specific task. Adjust the Temperature while training to optimise it for the desired output. This process allows the AI to generate more accurate and relevant responses over time.
Testing and Iterating for Optimal Results
The best way to find the ideal Temperature is through continuous testing and iteration. Every task is different, and by experimenting with various settings, you can discover the most effective Temperature for your project. Don’t be afraid to revisit your settings as the model’s needs evolve.
Balancing with Other Model Parameters
In addition to Temperature, parameters like top-p (which selects the top probability) and max tokens (which controls output length) also affect results. Consider adjusting these alongside Temperature for optimal performance.
Conclusion
Recap of Temperature Ranges and Use Cases
To recap:
- A low temperature (0.0-0.3) is best suited for factual, precise tasks, such as customer support.
- Medium Temperature (0.4-0.7) provides a good balance for tasks requiring a mix of logic and creativity.
- High Temperatures (0.7-1.0+) are perfect for creative, diverse outputs, such as story generation.
Final Tips for Experimentation
Experimentation is key. Try different temperature settings to see what works best for your project. Adjust based on the model’s output and fine-tune the parameters as necessary.
Final Nudge:
Now that you understand how to adjust the Temperature in Vertex AI, start exploring it yourself! By experimenting with different settings, you’ll quickly learn how to fine-tune your AI to meet the specific needs of your project. Happy experimenting!
FAQ Section
How do I choose the right Temperature for my Vertex AI model?
Consider the nature of your task. If you need factual, predictable answers, go with a lower temperature. If creativity and diversity are essential, increase the Temperature.
Can Temperature be set for each prompt in Vertex AI?
Yes, you can adjust the Temperature for each prompt individually in Vertex AI through the interface or programmatically.
What other parameters should I adjust when setting the Temperature?
Along with Temperature, experiment with max tokens to control the response length and top-p for diversity in responses. These settings work together to produce the best results.


Leave a Reply